

Rolling the same mass-produced dice at every game session can feel impersonal and disconnected from your carefully crafted character. Custom dice making allows for tailored designs reflecting specific game themes and player preferences, transforming gameplay into a more immersive experience. This guide walks you through selecting materials, mixing resin, casting molds, and finishing techniques to create unique dice that enhance your tabletop adventures.
Table of Contents
- Introduction To Custom Dice For Tabletop RPGs
- Prerequisites And Materials Needed
- Step-By-Step Resin Casting Process
- Design Customization And Coloring Techniques
- Sanding, Polishing, And Number Painting
- Common Mistakes And Troubleshooting
- Expected Timelines, Costs, And Quality Outcomes
- Enhance Your RPG Experience With Premium Dice Sets
- FAQ
Key takeaways
| Point | Details |
|---|---|
| Custom dice boost engagement | Personalized designs increase player immersion and make sessions more memorable. |
| Material safety is critical | Proper ventilation and protective equipment prevent health risks from resin fumes. |
| Precise mixing ratios matter | Accurate resin and hardener measurements ensure proper curing and dice durability. |
| Finishing improves quality | Sanding, polishing, and number painting create professional-looking, playable dice. |
| Common mistakes are avoidable | Following exact instructions and patience reduce failure rates significantly. |
Introduction to custom dice for tabletop RPGs
Dice determine outcomes in tabletop role-playing games, influencing combat results, skill checks, and story progression. Every roll shapes your character’s journey, making dice central to gameplay mechanics. Generic dice work fine functionally, but custom designs add personality and thematic consistency to your gaming table.
Players create custom dice for several reasons: matching character aesthetics, commemorating campaigns, giving personalized gifts, or building unique collections. A druid character might use dice embedded with tiny leaves, while a warlock player could prefer dark purple swirls with metallic gold numbers. These personal touches deepen the connection between player and character.
Understanding common dice types helps you decide which to craft first:
- D4 (four-sided): Used for small weapon damage and minor spell effects
- D6 (six-sided): Standard damage die for many weapons and abilities
- D8 (eight-sided): Medium damage rolls and healing spells
- D10 (ten-sided): Percentile rolls and specific weapon damage
- D12 (twelve-sided): Large weapon damage like greataxes
- D20 (twenty-sided): Attack rolls, saving throws, and skill checks
Most RPG systems rely heavily on D20s for core mechanics, making them popular starting projects. Different dice types serve specific purposes across various tabletop games, from Dungeons & Dragons to Pathfinder and beyond.
Custom dice transform functional tools into artistic expressions of your gaming identity. The tactile satisfaction of rolling dice you crafted yourself adds a layer of ownership to every game moment. Starting with simpler designs builds confidence before attempting complex multi-layer effects.
Prerequisites and materials needed
Successful dice creation requires specific materials and proper safety equipment before starting any project. Gathering everything upfront prevents mid-project delays and ensures consistent results.
Essential materials checklist:
- Epoxy resin: Two-part clear casting resin designed for small, detailed molds
- Silicone molds: High-quality molds with sharp facet definitions for each die type
- Pigments and dyes: Alcohol inks, resin-specific colorants, or mica powders
- Mixing tools: Disposable cups, stirring sticks, digital scale for precise measurements
- Safety gear: Nitrile gloves, respirator mask rated for organic vapors, safety glasses
- Finishing supplies: Sandpaper (400-3000 grit), polishing compound, acrylic paint for numbers
Epoxy resin quality directly impacts your final dice clarity and durability. Look for low-viscosity resins specifically marketed for casting small objects, as these flow into mold details better than thicker formulas. Premium dice sets demonstrate the quality achievable with proper materials and techniques.
Silicone molds should feature precise edges and smooth internal surfaces. Poor-quality molds produce dice with rounded edges or surface imperfections requiring extensive sanding. Invest in molds from reputable manufacturers to save finishing time later.
Workspace ventilation cannot be overstated. Epoxy resins emit volatile organic compounds during mixing and curing, causing headaches, dizziness, or respiratory irritation without proper airflow. Work near open windows, use fans to direct fumes away, or set up in a garage with adequate ventilation.
Protective equipment protects your health during the entire process. Nitrile gloves prevent skin contact with uncured resin, which can cause allergic reactions or chemical burns. Respirator masks filter harmful vapors more effectively than basic dust masks. Keep safety gear nearby and wear it consistently throughout your project.
Supply costs vary based on quality and quantity. Starter resin kits range from $20 to $40, mold sets cost $15 to $30, and pigments add another $10 to $25. Budget approximately $60 to $100 for initial supplies, with materials lasting multiple dice sets.
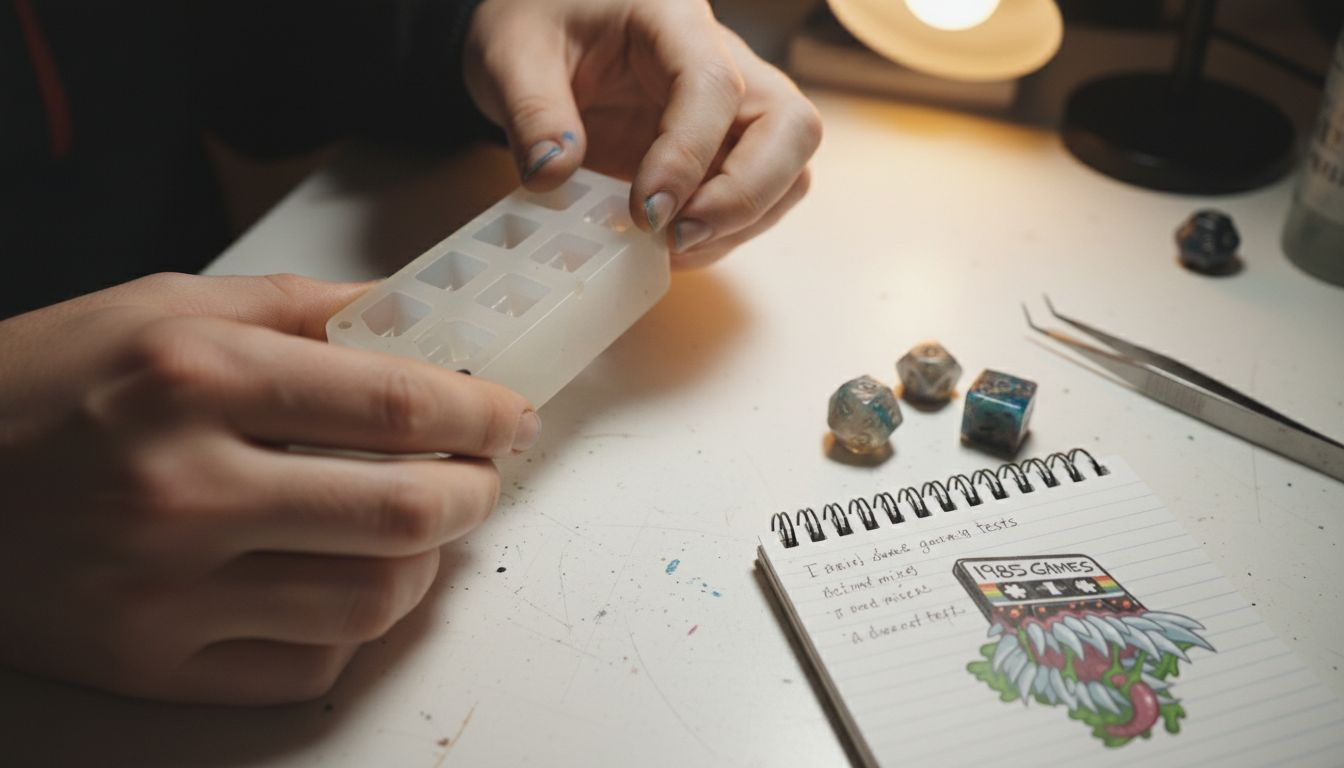
Step-by-step resin casting process
Precise execution during mixing and pouring determines whether your dice cure properly and remain bubble-free. Following exact steps prevents common failures that ruin batches.
-
Measure resin and hardener: Use a digital scale to weigh components according to manufacturer specifications, typically 1:1 or 2:1 ratios. Accurately measuring and mixing at precise ratios is critical for proper curing and hardness. Even small deviations cause incomplete curing or brittleness.
-
Mix thoroughly: Combine components in a disposable cup, stirring slowly for 3 to 5 minutes. Scrape sides and bottom repeatedly to ensure complete blending. Vigorous stirring introduces air bubbles, so maintain steady, gentle motion.
-
Add colorants: Mix in pigments, dyes, or special effects additives after combining resin and hardener. Start with small amounts, as a little pigment goes far. Test color intensity in a small sample before committing to full batches.
-
Pour slowly: Fill each mold cavity carefully, allowing resin to flow into corners and edges naturally. Pouring from low height minimizes air entrapment. Fill slightly above mold surface to account for settling.
-
Remove air bubbles: Tapping the mold and using low-heat sources like heat guns significantly improves clarity. Tap mold sides gently on your work surface to dislodge trapped bubbles. Hold a heat gun 6 to 8 inches above the mold for 10 to 15 seconds, moving constantly to pop surface bubbles without overheating resin.
-
Set curing conditions: Place molds in a dust-free area at room temperature (65°F to 75°F). Cover loosely with a box to prevent debris from settling on tacky surfaces. Avoid moving or disturbing molds during the first 24 hours.
Pro Tip: Work in 15-minute sessions when first learning, pouring only a few molds at a time. This prevents resin from beginning to cure in your mixing cup before you finish pouring. As you gain experience, you can increase batch sizes.
Curing times vary by resin brand and environmental factors. Most resins reach demolding firmness within 24 hours but require 48 to 72 hours for complete hardness. Rushing this stage produces dice that dent, scratch, or deform easily. Step-by-step approaches to using dice sets become more meaningful when your custom dice perform reliably at the table.
Patience during curing pays dividends in final quality. Dice removed too early may appear fine initially but develop surface tackiness or internal soft spots that ruin usability. Wait the full recommended time before demolding.
Design customization and coloring techniques
Color and visual effects distinguish your custom dice from commercial alternatives. Experimenting with different techniques creates signature styles recognizable at your gaming table.
Popular coloring approaches include single-color transparent dice, opaque solid colors, multi-layer swirls, and embedded special effects. Single colors work best for beginners, requiring only mixing pigment into resin before pouring. Transparent dice with vibrant dyes catch light beautifully and remain easy to read.
Layering resin with pigments and using additives like glitter or mica powders enables multi-colored and glow effects. Pour a thin layer of one color, let it partially cure for 30 to 60 minutes, then add a second color. This creates defined color bands or gradients depending on curing stage and pouring technique.
Achievable effects and additives:
- Metallic flakes: Gold, silver, or copper particles create shimmering finishes
- Glow powders: Phosphorescent pigments charge under light and glow in darkness
- Glitter: Fine or chunky glitter adds sparkle without obscuring numbers
- Mica powders: Create pearlescent, color-shifting effects from different viewing angles
- Small inclusions: Tiny flowers, foil pieces, or beads embedded for unique looks
Pigment compatibility affects both appearance and curing. Alcohol-based inks mix smoothly without interfering with resin chemistry. Some craft pigments contain water or oils that prevent proper curing, leaving dice sticky indefinitely. Purchase resin-specific colorants to avoid compatibility issues.
Planning color sequences prevents unwanted mixing or cloudiness. Test color combinations in small batches before committing to full dice sets. Document successful ratios and techniques for future reference. Why collect dice sets becomes clear when you’ve created multiple unique designs that showcase your evolving skills.
Advanced techniques like encapsulation require timing precision. Adding inclusions too early causes them to sink; too late prevents proper embedding. Practice with inexpensive materials before using precious components like real flowers or gemstone chips.
Sanding, polishing, and number painting
Raw cast dice emerge from molds with imperfections requiring finishing work before use. Proper sanding and polishing transform cloudy, rough dice into smooth, professional pieces.
-
Initial sanding: Start with 400-grit sandpaper to remove major imperfections, mold seams, and sprue attachment points. Work each face flat and even, checking edges for sharpness. This stage removes the most material and shapes dice geometry.
-
Progressive refinement: Move through 600, 800, 1000, 1500, and 2000-grit sandpaper sequentially. Each finer grit removes scratches from the previous stage. Wet sand with later grits by dipping sandpaper in water to reduce dust and improve smoothness.
-
Final polishing: Use 3000-grit sandpaper or polishing compound on a soft cloth to achieve glass-like clarity. Buff each face in circular motions until scratches disappear and transparency returns. This stage takes patience but dramatically improves appearance.
-
Clean thoroughly: Wash dice with soap and water to remove polishing residue. Dry completely before painting numbers.
-
Paint numbers: Painting dice numbers with acrylic paint or markers after curing provides crisp, readable faces. Use fine-tipped brushes or paint pens designed for detail work. Fill each engraved number carefully, wiping excess paint from surrounding surfaces immediately.
-
Seal if desired: Apply clear acrylic sealer spray in thin coats to protect painted numbers from wear. Multiple light coats work better than one heavy application.
Pro Tip: Before painting, fill number recesses with acrylic paint in a contrasting color, then immediately wipe the face clean with a damp cloth. Paint remains in engraved numbers while faces stay clear. This technique produces sharp edges without tedious brushwork.
Number readability matters more than aesthetics during gameplay. Choose paint colors with high contrast against your base resin color. White or metallic gold numbers stand out against dark dice, while black works best on light or transparent dice.
Sanding generates fine resin dust. Work in ventilated areas and consider wearing a dust mask during initial coarse sanding stages. Wet sanding reduces airborne particles significantly. Upgrading your dice before game night ensures every element of your gaming experience meets your quality standards.
Finishing takes longer than casting itself, often requiring 2 to 3 hours per complete dice set. The investment pays off when you roll perfectly balanced, beautiful dice that feel professional in your hand.
Common mistakes and troubleshooting
Learning from typical errors saves time, materials, and frustration. Understanding what goes wrong and why helps you prevent problems before they occur.
Frequent mistakes include:
- Incorrect resin ratios: Too much or too little hardener prevents proper curing, leaving dice sticky or brittle
- Insufficient mixing: Unmixed resin and hardener create soft spots or uneven curing within dice
- Trapped air bubbles: Rushing the pouring process or skipping bubble removal leaves visible voids
- Incomplete curing: Removing dice too early causes permanent softness or deformation
- Poor ventilation: Working in enclosed spaces leads to headaches, nausea, or long-term health effects
- Skipping sanding stages: Jumping from coarse to fine grit leaves visible scratches
- Contamination: Dust, moisture, or debris in resin causes cloudiness or surface imperfections
Improper mixing or contamination causes incomplete curing, leading to sticky or brittle dice in about 20% of novice attempts. This failure wastes materials and time, but remains entirely preventable with careful measurement and clean workspaces.
Troubleshooting strategies:
- Measure precisely: Use digital scales accurate to 0.1 grams for small batches
- Mix thoroughly: Set a timer for 3 to 5 minutes and stir the entire duration
- Tap molds repeatedly: Remove bubbles by tapping from multiple angles
- Wait full cure time: Mark calendars and resist checking dice early
- Ventilate adequately: Use fans, open windows, or work outdoors when possible
- Progress through grits: Never skip sanding steps, even when tempted
- Keep workspace clean: Cover work surfaces, wipe tools between uses, store materials properly
Health hazards from resin fumes require serious attention. Symptoms like headaches or respiratory irritation indicate insufficient ventilation. Stop work immediately, move to fresh air, and improve airflow before continuing. Chronic exposure causes sensitization, making future resin work impossible without severe reactions.
Balancing dice requires careful mold filling and curing. Partially filled molds or uneven curing creates weight imbalances affecting roll fairness. Test finished dice by rolling each face multiple times to check for bias. Severely imbalanced dice make poor game pieces regardless of appearance.
Patience prevents most failures. Rushing any stage invites problems requiring time-consuming fixes or complete remakes. Following instructions precisely, especially regarding ratios and cure times, dramatically improves success rates.
Expected timelines, costs, and quality outcomes
Realistic expectations about time investment and expenses help you plan projects and evaluate results appropriately. Understanding benchmarks prevents disappointment and guides skill development.
Typical project timeline:
- Preparation: 30 to 60 minutes gathering materials, setting up workspace, preparing molds
- Mixing and pouring: 15 to 30 minutes per batch, depending on complexity
- Curing: 24 to 72 hours before demolding, varying by resin type and temperature
- Finishing: 2 to 3 hours for complete sanding, polishing, and number painting per set
- Total active time: 3 to 5 hours spread across multiple days
Budget considerations vary based on quality preferences and quantity produced. Initial investment covers startup supplies, while subsequent projects only require resin and pigments.
| Method | Pros | Cons | Cost Range |
|---|---|---|---|
| Silicone molds | Superior detail, smooth finish, reusable | Higher initial cost, limited designs | $15-$30 per mold set |
| 3D printed molds | Custom designs, fast prototyping | Requires extensive sanding, surface roughness | $5-$15 per mold plus printer access |
| Professional dice | No time investment, guaranteed quality | No customization, higher per-die cost | $1-$5 per die |
| DIY resin casting | Full customization, lower long-term cost | Learning curve, time intensive | $0.50-$2 per die after initial investment |
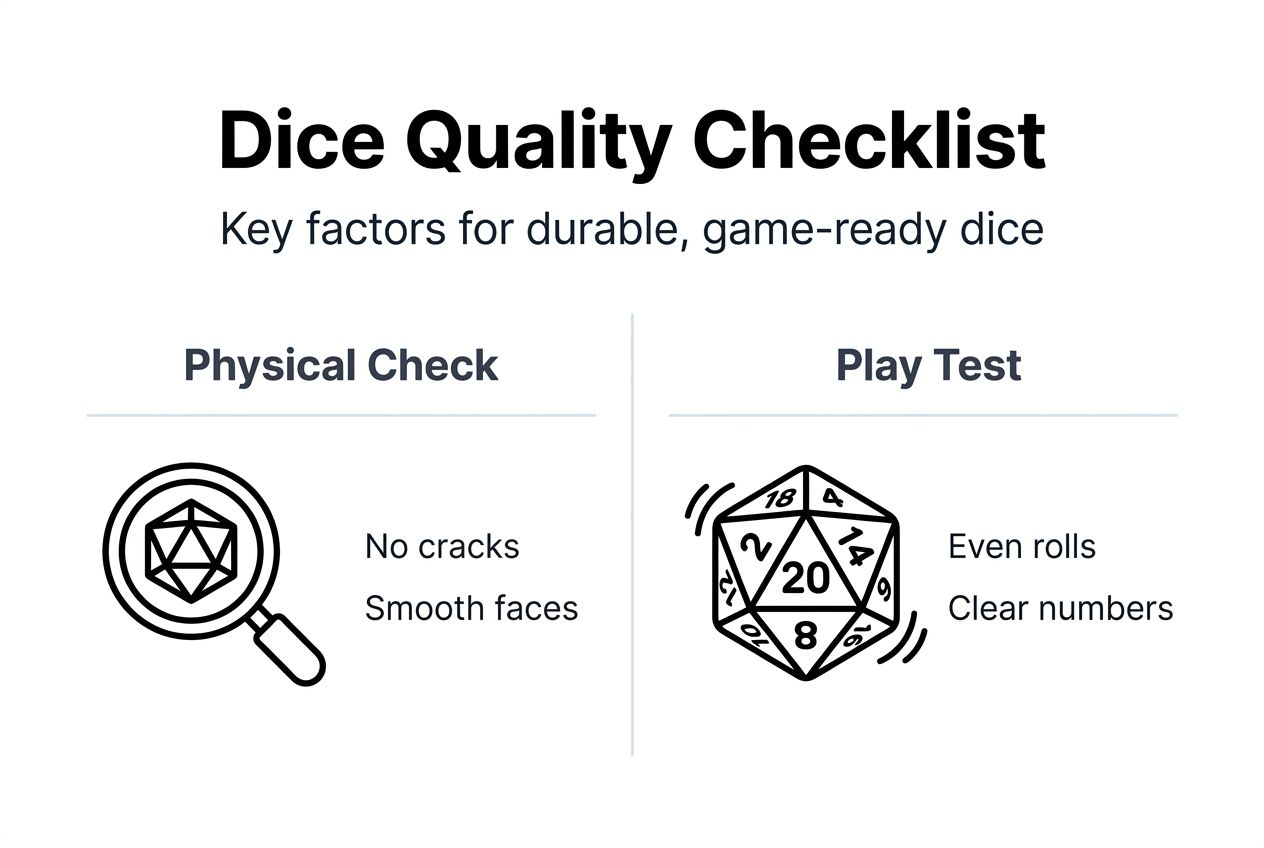
Quality benchmarks for finished dice include complete curing with no soft spots, smooth surfaces free from scratches or cloudiness, balanced weight distribution for fair rolls, and clearly readable numbers with good contrast. Your first few sets may not meet all criteria, but skills improve rapidly with practice.
Beginner goals should focus on completing full cure cycles and producing functional dice before attempting complex effects. Master single-color transparent dice first, then progress to swirls, layers, and special additives. Each successful project builds confidence and technical skill.
Material costs decrease significantly after initial setup. A $40 resin kit produces 10 to 15 complete dice sets, bringing per-set costs under $3. Compared to premium commercial dice at $15 to $30 per set, DIY casting becomes cost-effective after your third or fourth project.
Skill progression follows predictable patterns. Early attempts may have minor bubbles or sanding imperfections. By your fifth set, you’ll produce dice matching commercial quality. Continued practice enables advanced techniques like complex layering, precision inclusions, and custom mold creation.
Enhance your RPG experience with premium dice sets
Creating custom dice builds appreciation for craftsmanship behind quality gaming accessories. While DIY projects offer personalization, professionally crafted dice provide immediate gameplay enhancement without time investment. 1985 Games specializes in premium dice collections designed for tabletop RPG enthusiasts seeking both quality and variety.

Explore our buy 2 get 1 dice sets promotion to build your collection affordably. Each set features balanced rolls, crisp numbers, and distinctive designs that complement any character concept. Unique RPG mystery dice sets surprise you with curated designs matching various themes and playstyles.
Complement your dice collection with tabletop RPG battle maps that transform encounters into immersive tactical experiences. Our terrain maps feature detailed artwork supporting both combat encounters and exploration scenes. Quality accessories elevate every session, whether you’re rolling custom dice or professionally crafted sets.
FAQ
How long does it take for custom dice resin to fully cure?
Full curing typically requires 24 to 72 hours depending on resin brand, mixing ratio accuracy, and room temperature. Most resins feel firm enough to demold after 24 hours but haven’t reached maximum hardness. Complete curing ensures dice resist scratches and dents during normal gameplay. Patience during this stage prevents soft spots or surface tackiness that ruins usability.
Can I use 3D printed molds instead of silicone for dice casting?
3D printed molds work for dice casting but require significantly more finishing work than silicone alternatives. 3D printed molds reduce production time by 50% but often require extra sanding up to 3 hours per set. Layer lines from printing transfer to resin, creating surface roughness needing extensive polishing. Silicone molds remain preferred for superior surface finish and sharp facet detail without additional labor.
What safety precautions should I take when working with epoxy resin?
Always wear nitrile gloves and respirator masks rated for organic vapors when handling uncured resin. Epoxy resins emit volatile organic compounds during mixing and curing phases, requiring proper ventilation throughout projects. Work near open windows, use exhaust fans, or set up in garages with airflow. Never eat, drink, or touch your face while working with resin materials. Wash hands thoroughly even when wearing gloves.
How do I prevent air bubbles in my custom dice?
Preventing bubbles requires slow, deliberate pouring from low height into mold cavities. After filling molds, tap sides firmly against your work surface from multiple angles to dislodge trapped air. Use a heat gun held 6 to 8 inches above the surface, moving constantly for 10 to 15 seconds to pop surface bubbles. Mixing resin slowly and avoiding vigorous stirring reduces initial bubble formation significantly.
What’s the best way to balance custom dice for fair rolls?
Balancing requires careful attention during casting and curing. Fill mold cavities completely to identical levels across all dice in a set. Ensure uniform curing by maintaining consistent temperature throughout the process. Test finished dice by rolling each face 20 times and tracking results. Significantly biased dice indicate uneven resin distribution or partial curing. Properly cast dice from quality molds produce fair, random rolls comparable to commercial dice.